
As a video game making person I often have a need to make myself a tool in order to build a certain thing, create a certain type of effect, or just complete the task at hand in a timely fashion. Currently, the thing that seems to repeatedly facilitate that is a plugin for unity called Shader Forge. Shader Forge allows me to write shaders without knowing any code, I can click and drag to make connections between textures and the plugin's many different nodes to control how they affect what the material on the model is doing.
One problem that I'd been struggling with for a long time on the project I'm working on was to do with large scale props in the world. Anything intended to take up more than 5 to 10 metres of space very quickly started to look blurry as a 2k or even 4k texture was stretched beyond the detail it could realistically display. I saw the revelatory video embedded above about how this kind of problem is handled in the Unreal 4 engine, by creating basic materials like metal or rubber that are then referenced in a "master material" and assigning them to a mesh based on a pair of RGBA ID texture maps. Unfortunately, Unity has no kind of similar material instance function and manually plugging the textures into one material quickly creates problems that stop the shader compiling (you are only allowed a limited number before you hit pragma fragment pixel something errors).
I was, however, able to make a stripped down version that allowed me a base material, coated with 3 additional coat materials, and then a 4th that I usually reserve for a dirt/rust/lichen material. The reason this approach is so powerful- even without all the clever instancing, batching, and extra channels that Unreal 4 supports, is that I can tile every one of the separate materials creating sharp detail at any scale as long as you tile the textures proportionate to the scale of the object. This does have some initial textures created up front for the materials you're going to use but from then on your saving a diffuse and specular texture for every additional asset that utilises this shader and workflow. I start by making the asset normally and assigning IDs at the high poly to low poly baking stage, these IDs are further throughout the texturing process using masking in the Quixel suite.

IDs on a model
These IDs control where which parts of the mesh have which tiling textures assigned, in the example above the base layer (no ID) might be a metal, then the red- a coat of paint, the green- a rusted metal, and the blue a tarnished plastic. All of the textures are a mid luminance grey so that they can have their colour tinted, some have accompanying specular/gloss maps. Here is what the node layout looks like for the different textures being layered up and masked in the shader using the channel blend node.

Using channel blend to layer up materials much like coats of paint.
Using some shader magic, specifically a node given the minimalist name "round" I can round the values of the ID map up and down. So, for example, when a pixel in the ID map is between 100% red or 100% green the "round" node will round it to be one or the other, what this does is create a crisp divide between materials on the model and makes ID map resolution much less of an issue. The only place I don't do this is on the dirt ID where I usually want some transparency or feathering on the way the dirt sits on top of the other materials, this has its drawbacks but overall gives me more control to create like dustings of whatever is covering the asset.
The "round" node
I can expose texture slots, colour tint, and tiling controls on the material in Unity so that the colour palette and scale can be changed pretty quickly. It can become hard to tell textures apart without referring to the ID map though when all of them are grey initially.
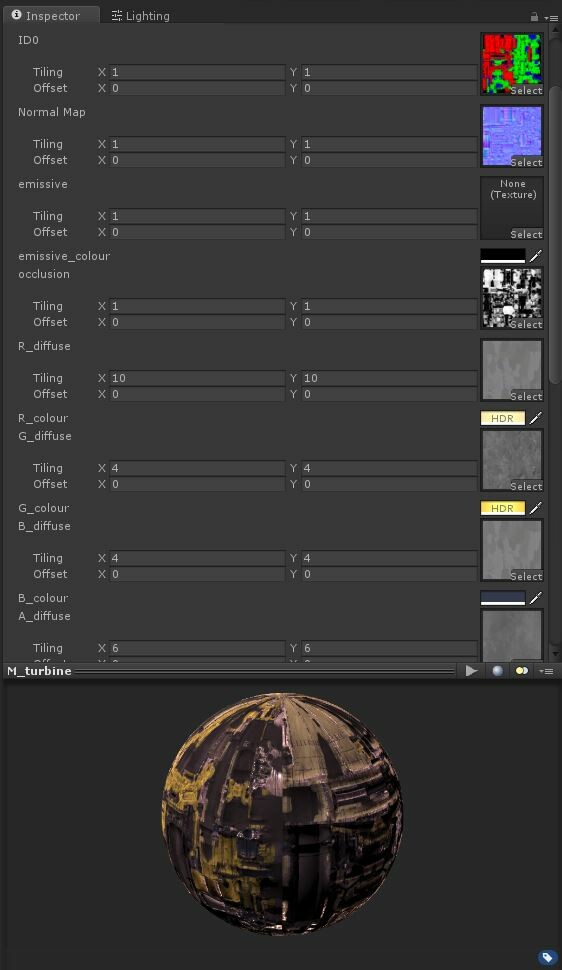
The Master Shader
This master shader has probably been the biggest advantage so far of using Shader Forge but I've also created my own billowing cloth shader using vertex offsets, a blurry and refraction glass effect shader (this one was slightly agonising to set up as it took about 20 nodes to do the work of one line of code). Je recommende.
P.S I was reading an old blog post of mine from 2 years ago today, it reminded me how much I used to enjoy writing this blog, and how much I miss it now. That, coupled and the burning need to bore someone with details of my shading adventures provided the impetus to write this down.